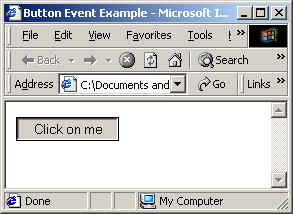
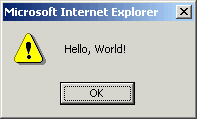
Example 1.1: When you click on the button, a dialog box appears with the message.
Chapter 1: Basics
Button Events and Functions
When you click on a button, move the mouse over an image, etc, you are generating events. You can capture these events and produce useful results with JavaScript.
| 1 2 3 4 5 6 7 8 9 10 11 12 |
<HTML> <HEAD> <TITLE>Button Event Example</TITLE> <SCRIPT Language="JavaScript"> <!-- function writeMessage(){ alert("Hello, World!"); } //--> </SCRIPT> </HEAD> <BODY> <FORM> <INPUT TYPE="button" value="Click on me" onClick="writeMessage()"> </FORM> </BODY> </HTML> |


Example 1.1: When you click on the button, a dialog box
appears with the message.
To create a button, type
<INPUT TYPE="button" value="button text"
onClick="functionName()">. This line needs to be
surrounded by a FORM tag, which is used in when you want to process more
complicated codes. For now, just include it and don't worry about it.
Button text shows up on the button (e.g. "Click on me"). In the example, we want some action to occur when the user clicks on the button. Thus the command 'onClick' is required. This is one of the many Event Handlers that come with JavaScript. Event Handlers look for any event that the user produces and carries out necessary operations. In this case, we use 'onClick' event handler to call up a function named 'writeMessage'.
Line 6-8 is a very simple function -- it has only one statement. A function is a chunk of code that can be called up however many times you want. Notice that it is in the HEAD section of the HTML document. Usually the functions are written in the head section, and they are called up in the BODY section when you want to use it. Here is the format to create a function:
function functionName( optional_argument1, optional_argument2, etc ) {
...content of the function...
}
Here, 'function' is a keyword reserved for JavaScript. It lets the interpreter know that what is coming up is a function definition. Note that JavaScript is case-sensitive. So you cannot type 'Function' -- you will be given an error message and the code will not work! Then you specify the name of the function, which needs to be all one word, i.e., no space is allowed. Following the function name is the parentheses containing optional argument list. In our example, we had empty parenthesis, meaning the function takes in no argument. Arguments are variables that are passed into the function by the caller. You will learn about them more in the next example.
Function definition needs to be enclosed in curly brackets, just as in the example. 'alert' is a built-in JavaScript method that displays the text that you put in the parentheses. The text should be surrounded by quotation marks. Finally, be sure to end each statement with a semicolon. Although JavaScript lets you get away with not having one, it is a bad habit.
Now that you learned how to define a function, here is how you call up a function. In our example, 'writeMessage' function takes in no argument. Thus onClick="writeMessage()" calls up the function whenever the button is pressed.
Variables; If & If-else statements
Suppose you want to build a stupid calculator. It adds two numbers passed into it, then adds 3 to the result. If the answer is greater than 10, it is displayed the result in the alert box. Otherwise, nothing happens. Here is how:
| 1 2 3 4 5 6 7 8 9 10 11 12 13 |
<HTML> <HEAD> <TITLE>Button Event Example 2</TITLE> <SCRIPT Language="JavaScript"> <!-- function add(x, y){ var answer = x + y + 3; if (answer > 10) alert(answer); } //--> </SCRIPT> </HEAD> <BODY> <FORM> <INPUT TYPE="button" value="Add 2 and 3" onClick="add(2,3)"> <INPUT TYPE="button" value="Add 5 and 10" onClick="add(5,10)"> </FORM> </BODY> </HTML> |
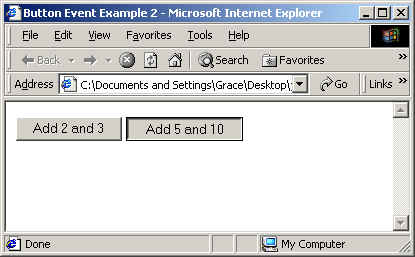
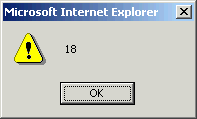
Example 1.2: When the first button is pressed, nothing
happens. When the second one is pressed, a dialog box with the answer
(18) pops up.
Here we introduce variables. You've probably used this name in a math class, and they work in similar ways. Variables let you store literals, which are numbers, strings, etc. You cannot use the keywords as your variables. In the 'add' function, we have three variables: x, y, and answer. X and y are arguments. Notice that we called the functions with the following lines: "add(2,3)" and "add(5,10)". Here we are pasing in two arguments, since we defined the function to take in two arguments. They are used in any way we want in the function. The third variable, answer, holds the final value of x+y+3. If you simply write x+y+3; you lose your result. Since we want to use the result to test if it is greater than 10, we assign the result to the variable answer.
So, in line 7, we have declared the variable answer and store the result of the addition. To see if our answer is greater than 10, we use the 'if' statement. The syntax is:
if (something is true)
this command line is carried out;
// ...otherwise it is skipped.
In JavaScript (as well as in Java and C++), the double slash sign (//) is used as comments. Other comparisons you can perform include:
< (less than)
== (equals. note that this is double '=' sign)
!= (not equal)
<= (less than or equal to)
>= (greater than or equal to).
A statement similar to if is the if-else statement. The syntax is:
...
if (condition)
this command line is carried out
when condition is true;
else
this command line is carried out
when condition is false;
For the above example, we could have written:
function add(x, y){
var answer = x + y + 3;
if (answer > 10)
alert(answer);
else
alert("Answer less than or equal to ten.");
}
Exercise 2: Random Number Generator
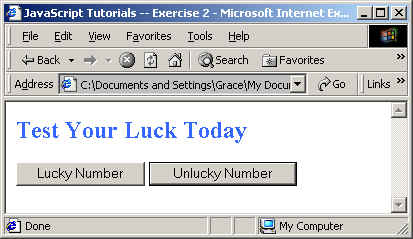
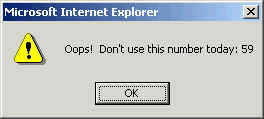
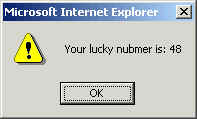
Make two buttons, one that says "Your Lucky Number" and the other "Your Unlucky Number". When the user presses the "lucky" button, a dialog box should pop out saying "Here is your lucky number: #", where # should be some random number. If the other button is clicked, the dialog box should say, "Oops, don't use this number today: #". Both numbers should be randomly generated and have a value between 1 and 99. Both buttons have to be handled by ONLY ONE function.
Generating random integers:
- Math.random() generates a random number between 0.0 and 1.0.
- Math.round(x) rounds the number x to the nearest integer.
Combining strings:
- if you type var strOne = "hello"; then strOne now holds the string "hello".
- if you type alert(strOne + ", everyone!"); then the resulting message is "hello, everyone!"
The page should look like this:
For-Loops
If you want to repeat a task several times, you can either write out all the commands, or you can be smart and use a for-loop. For-loop has the following format:
for ( var any = start_int; ending condition;
steps ){
for-loop body
}
Here is a concrete example:
for( var
num=0; num<10; num++){
document.write("Cats ");
}
A variable num is initialized with 0. Then we test if num is less than 10. If this is true, then num gets incremented by 1 (num++) and the body is executed. If not, the loop terminates. This code generates a document with "Cats" written on it ten times, since num can go from 0 to 9 before the loop terminates.
Link Events; Return Values; Variable Scope
Link Events are almost the same as button events, except that the event is generated when the user does something to a link, not a button. You simply create a link and insert an event handler, similar to the button examples.
| 1 2 3 4 5 6 7 8 9 10 11 12 13 14 15 16 17 18 19 20 |
<HTML> <HEAD> <TITLE>Link Event Example</TITLE> <SCRIPT Language="JavaScript"> <!-- var counts=0; function getCount(){ counts = counts + 1; return counts; } function greet(){ alert("Hello. You've touched me "+getCount()+" times."); } //--> </SCRIPT> </HEAD> <BODY> <A HREF="#" onMouseOver="greet()">Touch Here</A> </BODY> </HTML> |
In the example above, we have created a link in line 18. When HREF value is set to "#", the link destination is set to the top of the same page. You've seen this kind of syntax in the HTML tutorial, in the anchoring section. Instead of looking for mouse clicks, we would like to generate an event when the mouse pointer is simply placed over the link. So 'onMouseOver' event handler is used. The third handler is called 'onMouseOut()', which generates an event when the mouse is over a link/button/image and exits the area.
Let's analyze line 6 - 13, the JavaScript code. The 'greet' function is defined in line 11-13. It takes in no argument, and it simply calls up the 'alert' method to pop up a dialog box whenever the mouse is on the link. The message displayed in the dialog box is more interesting this time. First notice the plus signs to concatenate three different strings. Strings are characters surrounded by quotation marks. JavaScript provides many ways of manipulating strings. When you write, alert("Hello"+", World!");, you are concatenating two strings. The result is exactly the same as alert("Hello, World!");.
Also notice that we are calling the 'getCount' function while concatenating strings. When getCount() is called in line 12, line 7-10 is executed. This function adds one to variable 'counts' each time it is called, then it returns that variable to the caller. Thus when you first touch the link, you call greet(), which in turn calls getCount(). Then getCount() sets 'counts' to 1 (because count is 0 in the beginning) and returns the value of 'counts'. Next time getCount() is called, 'counts' becomes 2, and the function returns 2. This is your first counter!
You can make a function return anything you want. You can return literals, strings, arrays, and any other object. Remember, however, that when 'return' line is reached in a function, the function returns the appropriate item and immediately terminates. Suppose you write 'return;' between line 7 and 8. Then the function starts, sees the return line, and terminates without ever reaching the rest of the code. You can return nothing if what you wish is just to terminate the function.
Notice that when you hit the Refresh button in the browser, the counter starts back from 0. It is important to realize the scope of variables. In this case, 'counts' is a global variable. What this means is that the variable is initialized when the page is loaded, and its lifespan continues as long as the page is kept loaded. So when you refresh the page, 'counts' is re-initialized to 0. You can also have local variables, as opposed to global ones. Suppose you tweak example 4 so that line 6-10 looks liks this:
function getCount(){
var counts=0;
counts = counts + 1;
return counts;
}
The only thing changed is that 'counts' is initialized inside 'getCount' function definition. But this changes the entire functionality. Now variable 'counts' is initialized to 0 every time the function is called. So every time you touch the link, all you will see is "Hello. You've touched me 1 times.". So local variables are alive as long as the function is alive.
Exercise 3: Factorials and For-Loops
Make 5 links, each saying "Factorial of x", where x is 5, 10, 15, 20, and 25. When you click on each link, a diaolog box pops up with the correct answer. You should write a function that takes in an integer, calculates factorials, and returns an answer. Since we want the function to be general, you should test that the integer is less than or equal to 50 (we don't want to overload the system) and greater than or equal to 0. If the numbers are not in range, the dialog box should say "Invalid number". You can create another link that passes in 60 to test that your function works properly.
Factorials: Written as N!, where N is a whole number, N! = N * (N-1) * (N-2) * ... * 2 * 1. Thus 3! = 6. Note that 0! is mathematically defined to be 1.
Summary
Button & Link Handlers: onClick(), onMouseOver(), onMouseOut().
Programming concepts: Functions, Variables, Return values, Variable scope.
Programming techniques: If, If-else, For-loop.
Last Updated September 9, 2000 by Grace Pok