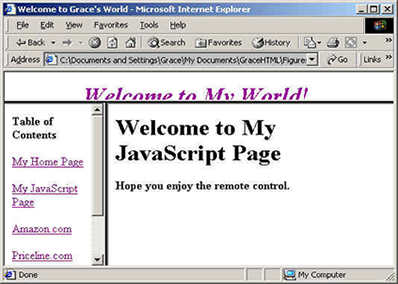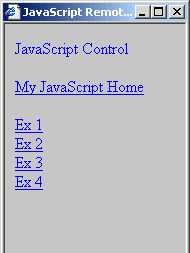

'myJava' page and the remote control pops up when My JavaScript Page link is clicked.
Chapter 2: Window Events
If you are reading this tutorial from a monitor, you are looking at a Window. Your web browser window probably has menu bars, navigation bars, status bar, and of course, the tutorial content. So Window is where you display your HTML document and JavaScript elements. JavaScript provides you with many tools for manipulating windows and capturing window events.
The Client-Side Object Hierarchy
Now that you've learned the gist of JavaScript, it's time to learn how the Object model works in JavaScript. In the introduction we've introduced the Document object. There are many more objects that are pre-defined in the client-side JavaScript. The list below shows the hierarchy.
Current Window (this is the global object)
|
As you can see, Document object is only one of the six objects that belong to the current Window object. The Window object acts as your global variable. So when you use the document.write("Hello, World!"); method, it is automatically assumed that you are referring to the current window that is opened. So far you have seen Document and Button objects. We will cover more of the objects mentioned above, but not all of them. If you'd like to explore JavaScript in detail, you are encouraged to buy a reference book (recommended: JavaScript: The Definitive Guide from O'Reilly) or consult an online reference.
Changing the Window's Location
Here is the simplest example of manipulating a window with JavaScript. We simply open a different page in the current window.
| <SCRIPT LANGUAGE="JavaScript"> <!-- window.location = "http://www.yahoo.com/"; //--> <SCRIPT> |
You are simply resetting the location property of the Window. You can also use self.location. Here is how to change the location with a button in HTML form:
| 1
2 4 |
<FORM>
<INPUT type = "Button" value="Go to Page" </FORM> |
Note that in line 3, we have page.html in single quotation marks. Since the value of onClick needs to be in quotation, and the window.location's value also needs to be in quotation, we alternate between single and double quotes. If you write, "window.location = "page.html";">, it will be seen as two strings ("window.location= " and ";") and you will receive an error.
To change the location through a link, type
<A HREF="javascript:window.location='page.html'">Type Link Label Here</A>
By specifying javascript: in the HREF value, you can carry out any JavaScript.
Opening New Windows
In Chapter 4 of the HTML tutorial (Link), you've learned out to open a link in a new window. Not only does JavaScript let you do the same, you also have more control over how the new window will look. Take a look at the example below.
| 1 2 3 4 5 6 7 12 |
<HTML> <HEAD> <TITLE>Window Opening Example</TITLE> <SCRIPT Language = "JavaScript"> <!-- function openWindow(){
} <BODY>
|
The link calls up the function 'openWindow()'. The function is defined in line 6-8. Line 7 creates a new Window object (by window.open). The general format is: window.open("page.html", "target_name", "properties");. It is crucial that you do not include any return carriages (return key or enter key) here. Line 7 is actually all in one line. The three strings that are passed in the window.open method are the arguments that are needed to control the new window:
page.html --> Address of the web page that will be displayed in the new window.
target_name --> The window's target name. This is mainly used for frames, etc. If you are not familiar with TARGET tags, refer to HTML Tutorial Chapter 4.
properties --> You can manipulate the properties of the new window with the following 7 fields:
width, height --> window pixel sizes
toolbar, menubar, status, scrollbars, resizable --> values are either 'yes' or 'no'.
Exercise 4: Window Clock
Create a HTML page with a button that says "TIME". When clicked, a new window should pop up that is 300 x200, with no toolbars, no menubars, no statusbar, and no scrollbars. Through the "Date" object, you can check for the user's time. The window should display the time of the user's computer. If the hour is between 8am to 6pm, the background of the new window should be "cyan" and the text in black. Otherwise, the window should be "black" background with white letters.
Date Object: "new Date()" returns the current date object of the user's computer. The "getHours()" function, when operated on an date object, returns the values between 0 (midnight) and 23 (11p.m.).
History
With JavaScript, you can make your own 'Back' and 'Forward' navigation buttons. They work through the history object, which stores the URL history of the browser and lets you go back and forth. Three methods of history object are mentionable.
history.back() and history.forward() --these work in the same manner as the 'back' and 'forward' buttons on your browser
history.go(x) -- this method takes in an integer, which indicates the relative position in the History list of the URL to be visited. For example, history.go(-2) has the same effect as pressing the 'back' button twice, and history.go(1) same as the 'forward' button.
The example below shows you how to implement these methods:
| 1 2 3 4 5 6 7 12 13 20 |
<HTML>
} <BODY> <FORM> <A HREF="javascript:history.back();">Click to go back</A><BR> |
Notice in the example above that line 14&15 serve the same functionality as line 20 and 21. The 'move' function that we have defined is more versatile, because we can pass in any number to go forward or backward however many steps we desire. Although this function has no extra purpose than to call the history.go() method, one can easily imagine adding other statements in the function to execute more interesting stuff (such as displaying a dialog box, etc).
Window Loading and Unloading
To call up a JavaScript function as a document is loaded/unloaded onto a window, you can use onLoad and onUnload event handlers. This section applies both to windows and to frames, since they are virtually the same.
There are many cases when you want to call up a JavaScript function when the page is loaded. For example, you might want to check which browser the viewer is using. Since Netscape and Internet Explorer have different HTML/JavaScript interpretor, you might want to test the browser, then load appropriate documents accordingly.
The onLoad/onUnload handlers are inserted in the BODY tag or the FRAMESET tag:
For window without frames, <BODY onLoad="some_function( )">
For window with frames, <FRAMSET ROWS="*,*" onUnload="some_function()">
Here is an example of testing browsers.
| 1 2 3 4 5 6 7 10 14 |
<HTML>
} <BODY onLoad="browserTest()"> |
Example 2.3: Testing browsers. Click here to see the example in a browser.
In line 7 and 8, we obtain the name and version of the browser through the navigator object. The properties are stored in thisapp and thisversion, which are displayed through the alert method.
Example: This demonstrates further onLoad and onUnload events.
Remote Control Example
You can create a small window with various links that will let you navigate on a big window. Take a look at this example:
| 1 2 3 4 5 6 7 8 9 10 11 12 13 14 |
........
} <BODY onLoad="remoteStart()"> |
1b 2b 3b 4b 5b 6b 7b 8b 9b 10b 11b 12b 13b 14b 15b |
....... <BODY> |
Example 2.4: Here we show some parts of the code for Remote Control. The first row (line 1-15) is for the page that calls the remote window. The second row (line 1b-15b) is for the remote control. Click here to see the example in a browser.
Let's focus on line 1-14. This is the HTML file that opens up the remote control page. In line 14, we call up remoteStart function on loading the page. The remoteStart function creates a new window and opens it (line 5), assigning the window as 'remote'. In line 6, we assign the URL address of the remote window. This is supposed to be the FULL address, not relative one, due to a bug in Netscape 2. In JavaScript, if a browser window creates a new window, the original window is referred to as the new window's opener. Some versions of Netscape don't do this automatically, so we do it automatically, as shown in line 7. Line 8 simply assigns the opener.name as "opener_window".
Line 1b through 15b show how the remote control works. It has several links that lets you navigate through our JavaScript tutorial, chapter 1-4. The links call up the go functioin in line 3b. This function takes in a string called url and sets the value of opener.location.href as the url. Here we use relative addresses.
Exercise 5: Your Own Remote Control
Here you will modify exercise 9 of the HTML tutorial (where you made frames with links). Modify your myJava.htm page so that when you click on the "My JavaScript Page" link, a remote control pops up. Hint: use "onLoad" handler. The remote control should have links to all the exercises you've done (1-4) for this JavaScript tutorial (hope you didn't delete them!). When the links are clicked, the destination pages should show up in the main frame of the original window. Also note that the rest of the links on the left frame of should still work as in the original version --> Pay attention to line 10 in example 2.4!
The results should be something like this:


'myJava' page and the remote control pops up when My JavaScript
Page link is clicked.
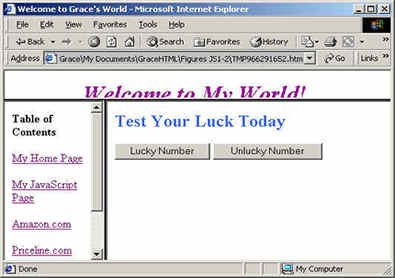
 Exercise 2 pops up when "Ex 2" link of the remote control
is clicked.
Summary
Object Hierarchy
Location
Opening New Windows
History
onLoad/onUnload
Last Updated September 9, 2000 by Grace Pok